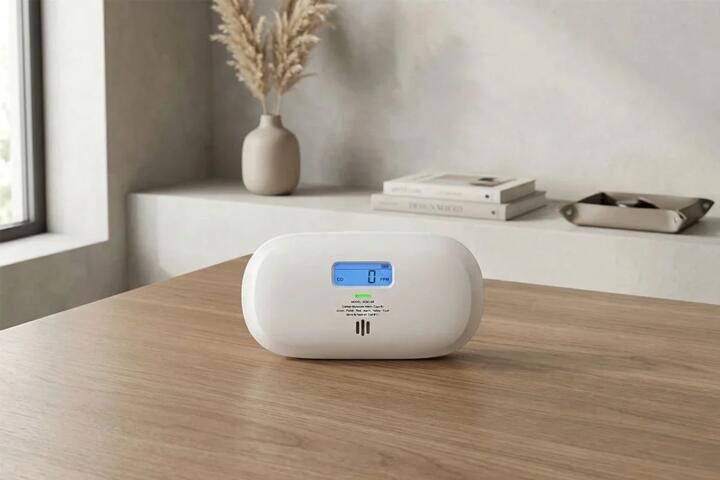
CO Detector Placement Basics
Carbon monoxide detectors measure CO concentration in air and trigger alarms when levels rise above the device’s programmed thresholds. Placement affects whether the detector samples the air you breathe during the time CO builds up. A detector near the source can respond faster, while a detector placed in a dead-air corner can delay the alarm, even when the home has the same CO level.
Most residential CO detectors are designed for typical indoor air mixing, not for measuring CO in a single “hot spot.” That means you still need to think about airflow paths: hallways, stairwells, and open-plan living areas often move air more than closed doors. If you have a forced-air furnace, the air handler can distribute CO through ducts, which changes where the first alarm may sound. I’ve seen people mount detectors “where the manual says” but ignore the actual airflow in their floor plan, which is where the delay happens.
For practical examples, consider a gas furnace in a basement. A detector placed only in an upstairs bedroom may not alarm early if CO first accumulates in the basement and then migrates slowly. A detector near the basement stair landing can catch the transition sooner, depending on how air moves between levels. For an attached garage, CO can enter the home through door gaps and shared walls, so placement near the door between garage and living space matters.
Common Placement Mistakes
People often treat CO detectors like smoke detectors, then copy the same mounting habits without checking the CO-specific guidance. CO is not always stratified like smoke, but it still moves with air currents, and the detector’s location relative to airflow paths changes the alarm timing. Many devices also have a “sensor inlet” that needs unobstructed airflow; covering it with paint, curtains, or stored items can reduce performance.
Another frequent error is placing detectors directly above cooking appliances or in areas with frequent steam. Steam and cooking aerosols can trigger nuisance alarms on some models, which leads to battery removal or disabling—then the detector fails when you need it. CO detectors should not be placed where they will be exposed to direct spray from humidifiers, showers, or kitchens. If you have a bathroom with a strong exhaust fan, the airflow can also pull air away from the sensor inlet.
Height mistakes also happen. Some people mount all detectors at eye level because it feels “visible,” then forget that the manufacturer’s instructions may specify a mounting height range. CO detectors are generally installed on walls or ceilings depending on the model, and the correct height depends on the device design and the manufacturer’s testing. A third mistake is ignoring “end-of-life” behavior: many detectors chirp or display a warning when the sensor reaches its service life, and that signal is not a low-battery warning.
Supporting technologies matter too. CO detectors rely on electrochemical sensors or other sensor types, and they require calibration stability over time. Battery-powered units often include a self-test routine, but self-tests do not replace real-world placement and periodic user testing. If you have interconnected detectors, the system’s wiring or wireless mesh can affect which unit alarms first, even when the CO level is the same.
Solutions And Advice
Pick Locations With Airflow
Start with the combustion sources and the paths CO can travel. Place detectors near sleeping areas so you wake up if CO builds up at night. Place at least one detector on each level of the home, especially where combustion appliances are located or where air can move between levels. If you have an attached garage, place a detector near the door connecting the garage to the home, not inside the garage unless the manufacturer instructions allow it.
Use your floor plan to map airflow: forced-air vents, return grilles, stair openings, and hallway doors. If you recently moved furniture, re-check the sensor inlet clearance; a sofa pushed against a wall can block the air path. I once reviewed a placement plan where the detector was mounted behind a tall bookcase; the unit still beeped during self-test, but the alarm timing during a controlled test was delayed because the sensor inlet airflow was restricted.
Mount At The Manufacturer Height
Follow the detector’s installation instructions for wall height or ceiling placement. Many wall-mounted CO detectors are installed near breathing height, often around 5 feet (about 1.5 m) from the floor, but models vary and some allow ceiling mounting. Ceiling placement can be appropriate for certain designs, yet wall placement can be better when ceiling mounting is blocked by beams or when the unit’s sensor inlet is designed for wall airflow.
Do not guess based on a smoke-detector rule. CO detector manuals may specify a maximum distance from corners, a minimum clearance from vents, and whether the unit should be mounted on a wall or ceiling. If your detector supports both mounting types, the height guidance still differs. A practical approach is to measure from the floor to the mounting bracket mark shown in the manual, then verify the sensor inlet is not obstructed by trim or wall coverings.
Test With A Real Schedule
Test the detector monthly using the device’s test button. Replace batteries when the unit indicates low battery, and treat sensor end-of-life warnings as a replacement trigger even if the battery still works. Many detectors also include a “chirp” pattern for low battery and a different pattern for end-of-life; the exact pattern depends on the model, so check the label or manual.
For interconnected systems, test each unit and confirm that alarms propagate. Some wireless systems require a short time to re-establish communication after power changes; I’ve seen a unit that passed its local test but did not trigger neighbors until the next cycle after a battery swap. If your detector has a model number printed on the back, record it in a home maintenance log so you can match the correct manual later.
Respond Correctly To Alarms
When a CO alarm sounds, treat it as a safety event. Move everyone to fresh air immediately and call emergency services or your local non-emergency line as directed by your local guidance. Do not “silence” the alarm and stay inside to see if it stops; CO can continue to build until the source is corrected and the home is ventilated.
After the alarm, identify and shut down potential sources if you can do so safely, such as turning off a malfunctioning furnace or checking for blocked vents. Have a qualified technician inspect combustion appliances and chimneys/flues. If you have a generator or vehicle running near the home, stop that activity and ventilate the area.
Case Examples For Real Homes
Example 1: Basement furnace and upstairs bedrooms. A renter in a two-story apartment reports that the CO detector in the hallway outside the bedrooms alarms late during a simulated CO release test. The detector is mounted on the far side of the hallway, behind a closed door that stays shut at night. The fix is to relocate the detector closer to the stair landing where air from the basement enters the hallway, while keeping the sensor inlet unobstructed and mounting at the manufacturer’s height.
Example 2: Attached garage and shared entry door. A homeowner installs one CO detector in the living room and one in a bedroom, but the alarm never sounds during a garage-related CO buildup scenario. The garage door between the garage and the home is often closed, and the living room detector is far from that shared wall. The fix is to add a detector near the door connecting the garage to the home, mounted per the manual, and to keep the unit clear of the door’s swing path and any stored items.
Placement Checklist And Table
| Decision Point | What To Do | Common Error | How To Verify |
|---|---|---|---|
| Near sleeping areas | Place detectors so alarms can wake occupants during night hours. | Mounting only in a living room far from bedrooms. | Confirm the sound path through hallways and closed doors. |
| Each home level | Cover floors where combustion sources or airflow paths exist. | Installing only on one floor. | Map furnace/boiler location to detector locations. |
| Garage connection | Place near the door between garage and living space. | Placing only inside the garage or only in the living room. | Check shared-wall distance and door usage patterns. |
| Mounting height | Use the manual’s wall or ceiling height guidance. | Using smoke-detector height rules for CO. | Measure from the floor to the bracket mark. |
| Monthly testing | Press the test button monthly and verify alarm sound. | Testing only when batteries chirp. | Log test dates; check interconnected units. |
| Sensor end-of-life | Replace when the unit signals end-of-life. | Treating end-of-life chirps like low battery. | Match the chirp pattern to the manual. |
Step-by-step checklist:
- List combustion sources (furnace, boiler, water heater, fireplace, gas stove) and their locations.
- Mark sleeping areas and the route from each level to those areas.
- Choose detector locations that cover each level and the path from likely CO entry points.
- Measure mounting height using the manual’s bracket mark, not a generic rule.
- Keep sensor inlets clear of curtains, stored items, and direct steam.
- Test monthly using the test button; for interconnected units, confirm all alarms trigger.
- Replace the detector when it signals end-of-life, even if the battery still works.
Common Mistakes To Avoid
Mounting too close to vents and fans can create airflow patterns that pull air away from the sensor inlet. People often place detectors near HVAC returns because the area “feels drafty,” then wonder why alarms are inconsistent. Keep the unit away from direct blasts from supply vents and away from locations where steam condenses on the housing.
Another mistake is ignoring nuisance-alarm behavior. If a detector alarms during cooking or showers, the response should be relocation and source control, not disabling the unit. Many households end up with a disabled detector after repeated nuisance alarms, which defeats the purpose of having CO detection.
Some people rely on a single detector for an entire multi-level home. CO can accumulate differently across levels depending on door use, stair airflow, and where the furnace circulates air. If you have a basement furnace, a detector only upstairs can miss the earliest phase of accumulation.
Finally, people confuse “test” with “calibration.” A test button checks the alarm circuit and sensor response in a built-in way, but it does not verify the detector’s accuracy against a known CO concentration. If you want higher confidence, follow the manufacturer’s guidance on professional checks or replacement intervals; some units have a stated service life, and sensor aging is a real factor.
FAQ
How High Should I Mount CO Detectors?
Use the detector’s installation instructions for wall or ceiling mounting height. Many wall-mounted units target around 5 ft (1.5 m) from the floor, but models vary, and smoke-detector height rules do not always match CO detector guidance.
Where Should CO Detectors Go In A Garage Home?
Place a detector near the door that connects the garage to the living space, mounted per the manual. Avoid relying only on a detector inside the garage if the device placement is not approved for that location by the manufacturer.
How Often Should I Test A CO Detector?
Test monthly using the test button. Replace batteries when the unit signals low battery, and replace the detector when it signals end-of-life, which often uses a different warning pattern.
Do CO Detectors Need To Be On Every Floor?
Most guidance covers placing detectors on each level of a home, especially where sleeping areas exist or where combustion sources and airflow paths can affect CO distribution. Multi-level layouts with basements or split levels often need more coverage.
What Should I Do If The Alarm Sounds?
Move everyone to fresh air and call emergency services or follow local guidance. Do not stay inside to wait for the alarm to stop; the CO source can continue until it is corrected and the home is ventilated.
Author's Insight
CO detector performance depends on sensor behavior, airflow patterns, and user maintenance. Placement guidance in manufacturer manuals and common fire-safety standards focus on covering sleeping areas and likely CO entry paths, then mounting at the specified height with clear sensor inlet airflow.
Testing intervals matter because batteries fail, sensors age, and interconnected systems can lose communication after power changes. A monthly test button check catches many failures early, while end-of-life signals prevent silent sensor drift.
Because detector models vary, the most reliable “source of truth” for height and placement is the specific manual printed on the unit label. If you have a model with a visible firmware or revision label (some units show a revision like “Rev. 3” on the back), record it so you can match the correct instructions later.
Key Takeaways
- Place CO detectors to cover sleeping areas and likely CO paths, not just where they are convenient.
- Mount at the manufacturer’s specified height and keep the sensor inlet clear of obstructions and steam.
- Test monthly with the test button and replace detectors when they signal end-of-life, not only when batteries chirp.
- When an alarm sounds, treat it as a safety event: get to fresh air and have combustion sources inspected.