Emergency Water Liters
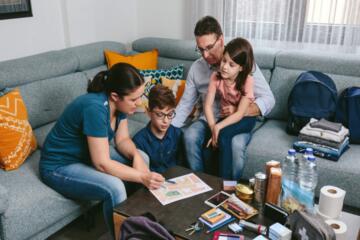
Emergency water planning starts with a simple question: how many liters per person you need to cover drinking and basic hygiene for a short disruption. For 24–72 hours, the most useful approach separates “drinking” from “non-drinking uses,” because the water needs per person change fast once you include handwashing, brushing, and toilet flushing. Many households store one number and then discover it runs out sooner than expected, especially when kids, pets, or hot weather raise consumption. A practical plan also accounts for the fact that stored water quality depends on container cleanliness and rotation schedules, not just the liters you buy.
For planning purposes, common public guidance from emergency agencies often uses a baseline of about 3 liters per person per day for drinking and basic needs. That figure is a planning target, not a guarantee of comfort, and it assumes moderate activity and typical household routines. If you want a more granular estimate, you can start with drinking water and then add a smaller allowance for hygiene. In practice, people tend to underestimate how much water they use for washing hands and preparing food, which is why the “basic needs” portion matters even during short events.
Common Planning Mistakes
People often plan for drinking only, then discover that cooking, brushing teeth, and handwashing consume a meaningful share of the stash. Another frequent error is assuming that “per person” means the same for everyone in the household; a toddler’s needs differ from an adult’s, and a caregiver’s water use rises when they assist someone who needs more frequent washing. Hot weather increases water intake and also increases the chance that stored water tastes “off” sooner, which can reduce how much people actually drink.
Container choice also drives outcomes. Water stored in food-grade containers tends to stay usable longer than water stored in unknown plastics, and sunlight exposure can degrade some materials. Even when the container is safe, people forget that water volume shrinks when they remove bottles for use and then top up later. If you rotate supplies late, you may end up with a stash that is numerically large but practically unusable because of taste, odor, or sediment.
Supporting technologies matter too, even for a “low-tech” plan. If you plan to treat water from a source, you need a method that matches the contamination risk: filtration without disinfection can leave pathogens behind, while chemical disinfection requires correct contact time and adequate mixing. Many households also rely on municipal water pressure staying on; when pressure drops, you may need to use stored water quickly because taps stop flowing. That dependency is why a 24–72 hour plan focuses on what you can access immediately.
How Much For 24–72 Hours
A practical planning range for short disruptions is 3 liters per person per day for drinking and basic needs. For 24 hours, that translates to about 3 liters per person; for 48 hours, about 6 liters per person; for 72 hours, about 9 liters per person. These numbers are widely used because they fit typical household consumption patterns during short outages, but they do not cover heavy sanitation needs like extended toilet flushing with no water supply.
If you want a more detailed breakdown, start with drinking water and then add a hygiene allowance. A common way to think about it is that drinking water often takes roughly half to two-thirds of the daily total in many households, while the rest supports minimal hygiene and food preparation. For example, if you allocate 2 liters per person per day for drinking and 1 liter per person per day for basic hygiene and cooking, you reach the same 3 liters/day planning target. That split helps you adjust when circumstances change, such as when someone is sick, when you have infants, or when you cook with stored water.
Households with infants, people with diabetes requiring frequent glucose checks and hydration, or caregivers assisting someone who needs more washing may need more than the baseline. Pets also change the math; a dog’s water needs can be substantial, and some households forget to include it in the “per person” plan. If you include pets, treat them as separate “units” and estimate their daily water needs from normal consumption, then add that to the household total. If you do not have that history, start with a conservative estimate and plan to adjust after the first day of use.
Step 1: Set Your Daily Target
Use 3 liters per person per day as a planning baseline for 24–72 hours. Multiply by the number of people and the number of days you want to cover: 1 person for 3 days is about 9 liters, while a family of 4 for 2 days is about 24 liters. If you expect higher use, such as hot weather or a household member who needs more frequent washing, increase the daily target and keep the extra water in smaller containers so it is easier to access. A practical aside: many people store large jugs, then struggle to distribute water during an outage, which slows use and increases waste.
Step 2: Choose Containers You Can Rotate
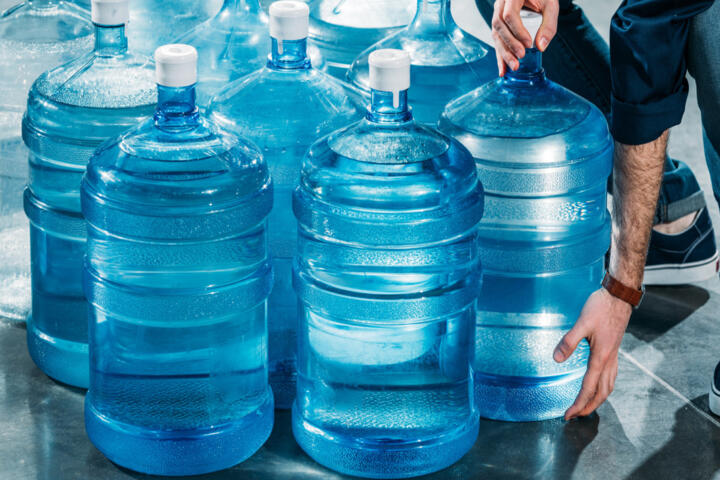
Store water in clean, food-grade containers and keep them out of direct sunlight. If you buy bottled water, check the best-by date and rotate on a schedule you can actually follow. If you use refillable jugs, label them with the fill date; a simple label system reduces the “which one is older?” problem that shows up during stressful events. A mild frustration many households experience: they buy extra water during a storm warning, then forget to rotate it later, so the stash becomes stale and gets discarded.
For taste and usability, keep containers sealed until use and avoid repeated opening. When you open a container, use it within a short timeframe based on the container type and storage conditions; the exact window depends on the product guidance. If you are using a home treatment method, follow the instructions for contact time and mixing, because disinfection performance depends on correct dosing and time.
Step 3: Plan for Hygiene Without Overuse
Hygiene water use can be managed with habits that reduce waste. Use a small amount for brushing teeth and wash hands with minimal water while focusing on soap friction, which removes germs more effectively than water volume alone. For food prep, rinse produce quickly and avoid soaking unless you have enough water to do it safely. If you have a toilet that relies on municipal water pressure, stored water may become the limiting factor; in that case, plan for reduced flushing frequency and consider alternative sanitation options if the outage lasts beyond your stored window.
For handwashing, the key mechanism is soap plus mechanical scrubbing, not a long-running tap. That means you can stretch hygiene water by using a controlled pour rather than leaving water running. A practical aside from household drills: people often forget to include water for cleaning hands after handling trash, which is where the “basic needs” allowance quietly disappears.
Step 4: Add Treatment Options for Non-Drinking Sources
If you plan to treat water from a source like a rainwater barrel, a pond, or a basement sump, plan the treatment method in advance. Filtration can reduce particles, but disinfection is needed for pathogens; chemical treatment requires correct contact time and works best when water is not heavily cloudy. Boiling works for many pathogens but consumes fuel and time, so it is not always practical for a whole household during a short outage. Keep treatment tools ready and test them during normal conditions, because instructions and parts availability matter when you are under stress.
Do not assume that “filtered” equals “safe to drink.” If the water source is unknown or visibly dirty, treat it as higher risk and follow a method designed for drinking water. If you cannot treat it reliably, reserve stored water for drinking and cooking and use untreated water only for non-contact uses when appropriate.
Educational Case Examples
Scenario: Two Adults, One Day
A household of two adults plans for 24 hours after a short municipal outage. They store 3 liters per person per day, totaling about 6 liters. During use, they discover that brushing teeth and cooking take more than expected, so they shift to minimal rinsing and controlled pours for handwashing. By evening, they still have enough drinking water because they kept a portion in small bottles for easy access. Their main lesson is that splitting water into drinking and hygiene containers prevents “all-or-nothing” depletion.
Scenario: Family of Four, Three Days
A family of four plans for 72 hours and stores about 9 liters per person, totaling about 36 liters. They label containers with fill dates and rotate one container each month so they do not end up with stale water. On day two, a child gets sick and the family increases handwashing and uses more water for cleaning, which pushes them toward the upper end of their daily target. They respond by reducing non-essential uses and focusing stored water on drinking and hygiene, while postponing non-urgent cleaning tasks. The outcome is not “perfect comfort,” but the plan keeps drinking water available throughout the full window.
Quick Checklist And Table
Use the table to set a baseline, then adjust for household factors like heat, infants, and sanitation constraints.
| Planning Window | Liters Per Person | Example Household | Total Liters |
|---|---|---|---|
| 24 Hours | ~3 L | 2 people | ~6 L |
| 48 Hours | ~6 L | 4 people | ~24 L |
| 72 Hours | ~9 L | 3 people | ~27 L |
Step-by-step checklist for turning liters into a usable plan:
- Count people who need drinking water, then add caregivers and children who require more frequent washing.
- Set a target of 3 liters per person per day for 24–72 hours, then add a buffer if heat or illness increases hygiene needs.
- Split water into drinking containers and a separate hygiene reserve so you do not drain drinking water first.
- Label containers with fill dates and rotate on a schedule you can track; a calendar reminder on the 1st of each month works for many households.
- Store containers where they stay cool and protected from sunlight; keep them off the floor if flooding is a risk.
- Test your treatment tools if you plan to treat non-municipal sources; a quick dry run prevents “missing parts” during an outage.
Common Mistakes To Avoid
Buying water without a rotation plan creates a false sense of readiness. If you cannot track dates, you may discard large volumes after they expire, which wastes money and reduces the effective stash. Another mistake is storing water in containers that were not designed for food use; some plastics can leach chemicals over time, especially with heat.
People also overestimate how long one large container will last because they forget to plan for access. When a jug is heavy, it may sit unused while smaller bottles run out, which forces rushed decisions. A mild frustration: the “one big jug” plan works until you need to distribute water to multiple rooms.
Finally, many households treat “water storage” as the only task. If you rely on municipal water pressure, you still need a plan for when taps stop working, and you need hygiene supplies like soap and hand sanitizer. If you plan to treat water, you need the right method for the water quality you might encounter, and you need to follow contact time instructions rather than guessing.
FAQ
How Many Liters Per Person For 24 Hours?
A common planning target is about 3 liters per person for 24 hours to cover drinking and basic needs like minimal hygiene and food preparation.
How Many Liters Per Person For 48 Hours?
A common planning target is about 6 liters per person for 48 hours, using the same 3 liters per person per day baseline.
How Many Liters Per Person For 72 Hours?
A common planning target is about 9 liters per person for 72 hours, assuming moderate household use and short disruption conditions.
Can I Store Water In Any Plastic Container?
Use food-grade containers intended for water storage and keep them out of heat and sunlight; containers not designed for food use can degrade or leach substances over time.
Do I Need Separate Water For Drinking And Hygiene?
Separating helps you manage depletion: keep drinking water in smaller containers and reserve a portion for hygiene so you do not run out of drinking water first.
Author's Insight
Emergency water planning uses simple liters-per-person targets because households need a number they can apply quickly under stress. The 3 liters per person per day baseline is widely used for short disruptions, but it assumes typical activity and moderate hygiene needs. Real-world use often shifts water from “drinking” to “basic hygiene” through brushing, cooking, and handwashing, which is why splitting storage into categories helps. Container safety and rotation schedules affect usability as much as the total liters, and taste or sediment can reduce actual consumption. A practical approach is to plan with the baseline, then adjust for heat, infants, illness, and sanitation constraints using your household’s normal consumption patterns.
Key Takeaways
- Plan around 3 liters per person per day for 24–72 hours, which equals ~3 L (24h), ~6 L (48h), and ~9 L (72h).
- Separate drinking water from hygiene water so drinking does not run out first.
- Use food-grade containers, protect from sunlight, and rotate based on fill or best-by dates.
- Account for hygiene and cooking water, not just drinking, because those uses rise quickly during outages.
- If you treat non-municipal water, match the method to the risk and follow contact time instructions.