Storm Weak Points
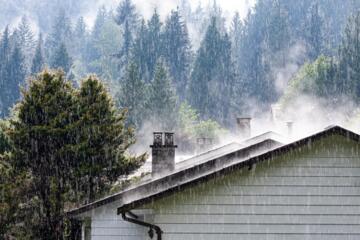
Wind and rain rarely damage a home evenly. Roof edges lift first, window seals leak next, and garage doors fail when wind pressure finds gaps around the frame. The pattern matters because each failure mode has different warning signs and different fixes.
Roof problems often start at the “interfaces”: where shingles meet vents, chimneys, skylights, and wall lines. Water then follows gravity and capillary action into attic spaces, where it can rot sheathing and spread under underlayment. In many storms, the first visible clue shows up after the wind: missing granules, lifted flashing, or a new stain line on an interior ceiling.
Windows fail through glazing cracks, frame distortion, or sealant breakdown. Even when glass survives, pressure differences can push water past exterior caulk and into the wall cavity. Garage doors fail through panel buckling, track misalignment, or weather-stripping gaps that let wind pressure reach the door’s interior.
Main Problems People Miss
Homeowners often inspect the “big surfaces” and skip the junctions. A roof can look intact from the street while flashing at a vent or the seal around a skylight is already compromised. The same mistake happens with windows: the glass may look fine while the exterior trim caulk has separated from the frame.
Another common error involves assuming that a single product fixes multiple weak points. Roof sealants, for example, do not replace properly installed flashing, and they do not stop water from entering through a lifted edge. Garage door weather-stripping also does not compensate for a door that is out of level or has worn hinges; wind finds the path of least resistance.
Supporting dependencies drive many failures. Roof performance depends on underlayment condition, fastener spacing, and the integrity of eave and ridge details. Window performance depends on the frame material, the condition of exterior sealants, and the presence of storm-resistant installation practices. Garage door performance depends on door balance, track alignment, and the condition of torsion springs and rollers—mechanical parts that can degrade quietly.
If you want a quick reality check, look for evidence of prior water intrusion. Stains near roof penetrations, peeling paint around window trim, and dust trails around garage door edges often indicate air leakage paths that storms will exploit. I’ve seen homeowners discover a failed corner seal only after they noticed a recurring musty smell in a closet—an observation that felt unrelated until the next heavy rain.
Roof, Window, Garage Prep
Roof Edges And Penetrations
Start with the roof perimeter and penetrations. From the ground, check for missing or loose shingles at eaves, rakes, and around vents. If you can access the attic safely, inspect around plumbing stacks, bathroom fan vents, and any skylight curb for damp insulation or darkened wood. Use a flashlight and a mirror; you’re looking for water trails, not just wet spots.
For quick measurements, note the condition of flashing seams and whether caulk lines look cracked or separated. Flashing should sit tight to the roof surface; if you see gaps, water can enter during wind-driven rain. When you plan repairs, match materials: metal flashing, compatible sealants, and correct shingle underlayment layering. A mismatch can fail faster than the original problem, especially where roof temperatures swing.
Document what you find with photos and dates. Many insurance claims hinge on proof of pre-storm condition and the sequence of damage. If you’re using a phone, the built-in “location” and “timestamp” metadata can help, though you should verify it in your camera settings (on iOS, for example, the Photos app shows capture date; on Android, the gallery often shows time and date).
Window Seals And Trim
Inspect exterior caulk lines and trim joints around each window. Look for gaps, peeling paint that exposes a seam, and soft spots where water may have entered. Check weep holes at the bottom of window frames if your window design includes them; blocked weeps can trap water behind the cladding.
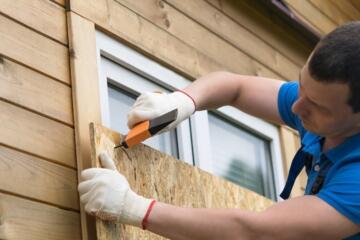
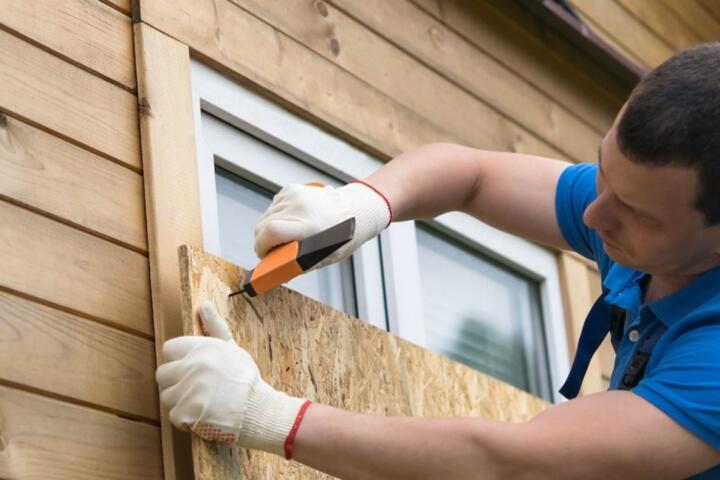
Test the window’s operation and latch engagement. A window that closes but doesn’t compress evenly can leak under pressure. If you have storm shutters or plywood, stage them early and label which window they cover; rushing during a storm often leads to incorrect fit and wasted time.
For temporary protection, follow the manufacturer’s instructions for any film or shutter system you own. Generic plastic sheeting can reduce debris impact but does not reliably stop water intrusion at edges. If you use tape, choose weather-rated tape and plan to remove it after the event; leaving it on for weeks can damage paint or trim.
One small aside: I’ve watched people cover windows with “whatever is in the garage,” then discover the tape won’t stick to dusty vinyl trim. A 10-minute wipe with a dry cloth before applying adhesive can prevent that kind of failure.
Garage Door Weather And Tracks
Garage doors fail when wind pressure pushes air through gaps around the frame and under the bottom seal. Inspect the weather-stripping along the sides and top, and check the bottom seal for tears or flattening. If the door is slightly out of level, the seal may contact only part of the threshold, leaving a narrow leak path that storms exploit.
Check the door’s mechanical condition. Look for loose mounting brackets, worn rollers, and track bends. If the door binds when you open it manually, fix that before storm season; a door that sticks can also misalign the seal under load. Do not attempt torsion spring repairs without training; spring tension injuries are a known risk.
For a practical outcome target, aim for even seal contact across the full width. You can test this by closing the door on a thin strip of paper at multiple points along the bottom seal; consistent resistance suggests better contact. If you find only one or two spots that grip, adjust the door or replace the seal rather than adding temporary tape.
When you stage supplies, keep a small ladder, a flashlight, and a roll of painter’s tape for labeling. On my last home inspection checklist draft (version 3.2, dated 2024-10-06), labeling the garage door edge locations saved time because the weather-stripping points look similar when you’re stressed.
Case Examples From Real Scenarios
Wind-Driven Rain Through Roof Flashing
A homeowner in a coastal area noticed a new ceiling stain two days after a storm. The roof looked intact from the street, but attic inspection showed damp insulation around a bathroom vent boot. The vent flashing had lifted at one seam, and the underlayment edge had absorbed water that later wicked into the ceiling.
The repair plan focused on removing and reinstalling the flashing with correct layering, then sealing only the compatible joints. After repair, the homeowner documented the pre-repair photos and the attic condition for the insurance adjuster. The key lesson was that roof “surface” condition did not predict flashing integrity.
Garage Door Seal Gap After Door Shift
A renter reported water pooling near the garage threshold after a heavy rain with strong gusts. The garage door panels stayed intact, but the bottom seal showed a gap on the hinge side. A quick check found the door slightly out of level, likely from track wear and loose fasteners.
The fix involved tightening mounting points and correcting track alignment, then replacing the bottom seal. The renter avoided temporary tape, which had failed earlier because it peeled off during wet conditions. The practical takeaway: wind pressure finds small gaps, and mechanical alignment affects seal contact.
Checklist For Decision Support
| Area | What To Inspect | Common Failure Mode | Action Before Storm |
|---|---|---|---|
| Roof edges | Loose shingles at eaves/rakes; missing granules; lifted edge lines | Wind uplift and water entry at underlayment edges | Repair loose sections; confirm fasteners and underlayment layering |
| Roof penetrations | Flashing seams; vent boots; skylight curb seals | Flashing separation and capillary water migration | Reinstall compatible flashing; inspect attic for damp trails |
| Windows | Exterior caulk lines; trim gaps; weep holes; latch compression | Sealant failure under pressure differences | Re-caulk compatible joints; stage shutters/film per manufacturer |
| Garage doors | Bottom seal contact; side/top weather-stripping; track alignment | Wind-driven air leaks through frame gaps | Adjust alignment; replace worn seals; avoid spring repairs |
Common Mistakes That Cost Time
People often wait until a storm watch to inspect. That timing reduces visibility, increases ladder risk, and encourages rushed patchwork. If you can’t inspect safely, you can still document from the ground and plan repairs after the event.
Another mistake involves using the wrong repair approach. Sealing a roof penetration with caulk alone can fail if the flashing layering is incorrect. Replacing window glass without addressing exterior sealant and trim joints can also leave the water path unchanged.
Garage door fixes sometimes focus on the door panels while ignoring the frame and threshold. A door can look straight but still leak if the bottom seal is compressed unevenly. Tape and temporary plastic sheeting often peel off during wet wind, which turns a small gap into a larger one.
Finally, many homeowners skip documentation. Photos taken after the storm show damage, but they do not always show pre-existing conditions like cracked caulk lines or worn weather-stripping. A simple dated photo set before storm season can reduce back-and-forth with adjusters.
FAQ
How can I spot roof flashing issues early?
Look for cracked or separated caulk at vent boots, lifted flashing edges, and recurring attic dampness near penetrations. After rain, check for dark streaks on underside sheathing or insulation near the penetration.
Do storm shutters replace window caulk repairs?
Shutters can reduce debris impact, but they do not correct failed exterior sealant joints. If caulk lines are cracked or separated, water can still enter when shutters are not fully sealed or when wind-driven rain reaches edges.
What garage door gap size matters most?
Wind-driven rain can enter through small gaps along the bottom seal or side weather-stripping. The practical test is even seal contact across the full width; uneven contact indicates a leak path even when the gap looks minor.
Is it safe to adjust garage door tracks before storms?
Basic tightening and alignment checks can be safe if you follow the door manual and avoid spring work. Do not attempt torsion spring adjustments; spring tension injuries are a known hazard.
Should I cover windows with plastic during a storm?
Plastic sheeting can reduce debris impact, but it rarely stops water at edges and seams. If you use a temporary cover, secure it tightly and plan to remove it after the event to prevent residue damage.
Author's Insight
Storm damage patterns follow physics: wind creates pressure differences, and water follows the lowest-resistance paths at interfaces. Roof edges, roof penetrations, window trim joints, and garage door weather-stripping all share the same vulnerability—small discontinuities that become leak channels under gusts.
Evidence-based prep focuses on inspection and documentation, not just products. A dated photo set, a short list of junctions to repair, and a staged plan for temporary protection reduce confusion when conditions worsen.
Because building materials and installation methods vary by region and product, repair steps should match the original system. If you’re unsure about flashing layering, window installation details, or garage door balance, a licensed contractor can confirm the correct approach before you spend money on mismatched fixes.
Key Takeaways
- Inspect junctions first: roof edges, penetrations, window trim caulk lines, and garage door seals.
- Look for evidence of prior leakage such as attic dampness, trim peeling, or recurring musty odors.
- Fix the cause, not only the symptom: flashing layering, sealant compatibility, and garage door alignment drive performance.
- Stage temporary protection early and label it; rushed installs often fail at edges.
- Document pre-storm condition with dated photos to support insurance discussions after the event.