Smoke Alarm Coverage Basics
Smoke alarms detect smoke particles and trigger an audible alarm so occupants can react before heat and flames spread. Placement matters because smoke moves differently through a home than people expect, especially around stairwells, open-plan kitchens, and hallway corners.
Most jurisdictions in the United States reference model fire codes and local amendments that require smoke alarms in specific locations such as bedrooms and outside sleeping areas. Common guidance also calls for alarms on every level of a home, including basements, and in hallways that connect to bedrooms. If you live in an apartment, the building’s fire safety plan and the landlord’s maintenance schedule often control what gets installed and when.
Spacing rules aim to keep the alarm within the smoke layer that forms near the ceiling during a developing fire. In practice, ceiling height, airflow from HVAC vents, and obstructions like beams or soffits change how smoke reaches the sensor. I’ve seen people mount an alarm “near the center” of a room and still get nuisance alarms from cooking smoke, which usually means the unit is too close to the source or the airflow path is wrong.
Main Coverage Mistakes
People often place smoke alarms where they can reach them quickly, not where smoke is likely to accumulate first. A hallway alarm mounted at the wrong end of a long corridor can miss the smoke plume that forms at the ceiling near the bedroom doors. Another frequent error is relying on a single alarm to cover multiple bedrooms through an open doorway, even when the smoke must travel around turns.
Spacing guidance depends on the alarm’s listed coverage area and the ceiling type. Many consumer alarms state a maximum coverage area in square feet and a maximum ceiling height in the manual. If you ignore those limits, you may end up with coverage gaps that testing won’t reveal because a test smoke cartridge does not reproduce real fire smoke flow.
Dependencies also matter. Photoelectric sensors respond strongly to smoldering smoke, while ionization sensors respond more quickly to flaming fires; dual-sensor units combine both detection methods. Interconnection adds another layer: interconnected alarms can sound together, but only if the units are compatible and wired or paired correctly. A battery-only alarm that is not interconnected will still alert locally, yet it may not wake someone in another bedroom.
Finally, people confuse “it chirps” with “it works.” A chirp usually indicates a low battery or end-of-life warning, but the alarm’s sensing chamber can still be contaminated by dust, insects, or cooking residue. That contamination can shift sensitivity and increase nuisance alarms, which leads some households to disable the unit—an outcome that defeats the purpose of early warning.
Solutions And Practical Advice
Place Alarms By Layout
Start with the sleeping areas. Install alarms in each bedroom and outside each separate sleeping area, typically in the hallway or near the entrance to that sleeping zone. For open-plan homes, treat the “outside sleeping area” requirement as a placement problem: you still need an alarm that will hear smoke before it reaches the bedrooms, which often means mounting near the path smoke takes from the kitchen or living area toward the hallway.
Use the alarm manual’s listed ceiling height and coverage area. If the manual allows up to a certain ceiling height, do not exceed it without checking the manufacturer’s guidance. For sloped ceilings, many listings specify placement relative to the peak and the distance from the apex; following those instructions reduces the chance that smoke forms above the sensor’s effective zone.
For kitchens, avoid mounting directly above cooking appliances. Cooking aerosols can trigger nuisance alarms, and the resulting “hush” button habits can delay response during a real event. A common compromise is to mount the alarm in the adjacent hallway or near the kitchen exit route rather than in the kitchen itself, but local code requirements may still require a kitchen alarm in some jurisdictions.
Respect Spacing And Obstructions
Spacing rules are not one-size-fits-all because listings vary by model. Many alarms specify a maximum distance between units and a maximum coverage area per alarm. When ceilings have beams, soffits, or HVAC supply vents, smoke may stratify or be diverted, so you may need additional alarms even if the room’s square footage fits within the stated coverage.
Check for “dead air” pockets. If a ceiling fan or supply vent creates strong downward airflow, smoke may not rise into the sensor’s detection region as it would in still air. I once reviewed a placement plan where the alarm was centered but the HVAC register blew directly across the ceiling; the household reported frequent nuisance alarms during cooking, which suggested the smoke transport pattern was being altered.
For interconnected systems, spacing still matters because each unit must detect smoke locally. Interconnection improves audibility, not detection physics. If one unit is in a coverage gap, the rest of the network cannot compensate.
Plan Battery And Unit Replacement
Battery replacement timing depends on the alarm type. Hardwired alarms with battery backup require periodic battery changes, and many manufacturers recommend replacing the backup battery at least once per year or when the unit signals low battery. Some jurisdictions also require periodic testing and battery replacement schedules, but the exact interval varies by local code and alarm model.
Alarm replacement timing is different from battery replacement. Most smoke alarms have a stated end-of-life date, often around 10 years from installation, because sensor components and electronics age. Many units include a chirp or voice message when they reach end-of-life, but you should not wait for that warning if you can identify the installation date. If you moved into a home and do not know the age, treat the alarms as “unknown age” and plan a replacement cycle.
For sealed 10-year battery alarms, there is no user battery swap; you replace the entire unit when it reaches end-of-life. Dual-sensor alarms still age as a device, so the replacement interval follows the manufacturer’s end-of-life rating rather than the sensor type.
Test With Realistic Habits
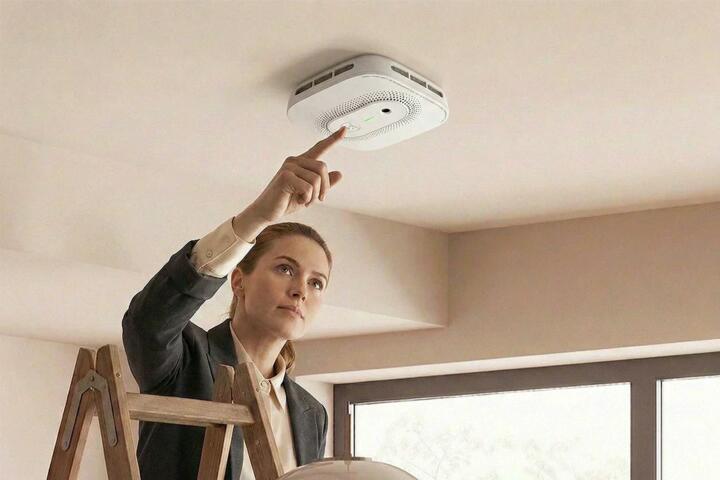
Use the test button monthly. The test button checks the alarm’s horn and electronics, not the full smoke detection pathway. For sensor verification, follow the manufacturer’s instructions for using listed test smoke or a compatible test method; avoid improvising with aerosols that are not intended for smoke alarms.
After any false alarm event, clean the unit if the manual allows it and inspect for dust buildup. Many manufacturers recommend vacuuming around the sensor opening with a soft brush attachment. If nuisance alarms persist, repositioning the alarm or adjusting placement away from cooking aerosols often works better than repeated “hush” button use.
Keep a simple log: installation date, battery change dates, and test dates. A paper checklist on the breaker panel or a note in a home maintenance app helps when you need to prove compliance to a landlord or when you’re deciding whether to replace unknown-age units.
Case Examples For Real Homes
Long Hallway With Bedrooms
An anonymized household in a two-bedroom home installed one smoke alarm at the far end of a long hallway outside both bedrooms. During a controlled cooking event, the alarm sounded late because smoke traveled around a door and stratified near the ceiling only at the bedroom-side end. The fix involved adding a second alarm closer to the bedroom doors and keeping the original unit for broader coverage. The household also cleaned the sensor after repeated cooking smoke exposure, which reduced nuisance alarms.
Sloped Ceiling In A Loft
An anonymized renter with a loft bedroom on a sloped ceiling mounted a smoke alarm near the center of the room. The alarm met the room’s square footage coverage but did not respond reliably during a test smoke event. The manual specified placement relative to the peak and distance from the apex for sloped ceilings, so the household remounted the alarm to match the listing. After remounting, test results aligned with the expected response pattern, and nuisance alarms from nearby airflow decreased.
Coverage Checklist And Comparison
| Decision Point | What To Check | Typical Outcome | Common Failure Mode |
|---|---|---|---|
| Bedroom Coverage | Alarm in each bedroom and outside each sleeping area per local code | Earlier warning for occupants | One alarm covering multiple bedrooms through turns |
| Spacing Limits | Manual’s max coverage area and ceiling height | Fewer coverage gaps | Ignoring listing limits on high ceilings |
| Sloped Ceilings | Placement relative to peak per listing | Sensor sits in smoke layer | Mounting at a “center” point that misses the peak zone |
| Replacement Timing | End-of-life rating, usually around 10 years | Reliable detection over device life | Waiting for chirp when installation date is unknown |
Step-by-step checklist you can use during a walk-through:
- Write down the alarm model numbers and look up the manual for ceiling height and spacing limits.
- Confirm alarms exist in each bedroom and outside each sleeping area on every level, including basements where required.
- Check mounting surfaces: flat ceiling vs sloped ceiling vs beams/soffits, then follow the listing’s placement rules.
- Verify battery type: replaceable battery vs sealed 10-year unit, then record the date.
- Test monthly using the test button; after nuisance alarms, clean per manual and reassess placement near cooking sources.
Common Mistakes That Reduce Trust
People sometimes claim that “any alarm placement works” because the test button sounds. That test confirms the horn and electronics, not that smoke will reach the sensor in the same way during a real fire. A second mistake is using non-listed aerosols for testing, which can damage sensors or leave residues that later cause false alarms.
Another recurring issue is mixing alarm types and brands in an interconnected network. Interconnection compatibility varies by manufacturer and model; pairing incompatible units can lead to partial interconnection where only some alarms trigger. If you see a “wireless interconnect” label, follow the pairing instructions and keep the pairing mode stable during setup.
Some households disable alarms after repeated nuisance events. That behavior often starts with a placement problem near kitchens or bathrooms, then becomes a habit. If nuisance alarms persist, cleaning and repositioning usually fix the root cause more reliably than repeated hush use.
Finally, replacement timing gets treated like a battery-only task. A sealed 10-year alarm still reaches end-of-life even with a “good” sounder, and a hardwired alarm’s sensor can age even if the backup battery is new. If you find an alarm with a missing label or unknown installation date, replacing it is the safer path than guessing.
FAQ
How Many Smoke Alarms Are Needed?
Most homes need alarms in each bedroom and outside each sleeping area, plus coverage on every level. Local code requirements vary, so check your jurisdiction and the alarm listing’s coverage limits for spacing.
What Is The Correct Spacing Between Alarms?
Spacing depends on the specific alarm model’s listing, including maximum coverage area and ceiling height. Use the manual’s stated limits rather than a generic rule of thumb.
When Should Smoke Alarms Be Replaced?
Replace the entire alarm at its stated end-of-life rating, commonly around 10 years from installation. Replace batteries on the schedule recommended for your alarm type, but device end-of-life still requires full replacement.
Do Photoelectric And Ionization Sensors Differ?
Photoelectric sensors generally respond more to smoldering smoke, while ionization sensors generally respond more quickly to flaming fires. Dual-sensor alarms combine both detection methods, but placement and testing still govern performance.
Why Do Smoke Alarms Chirp Or Hush?
A chirp usually indicates low battery or end-of-life warning, depending on the model. The hush button temporarily silences nuisance alarms, but it does not fix the underlying placement or contamination issue.
Author's Insight
Smoke alarm performance depends on three linked factors: detection type, placement relative to smoke movement, and device age. Manuals and listings carry the most reliable spacing and ceiling-height guidance because they reflect how the manufacturer tested the alarm. A monthly test button checks the horn and electronics, so it does not replace periodic cleaning and correct placement.
For replacement timing, the end-of-life rating matters more than whether the alarm still sounds during a test. If you cannot confirm installation dates, treating alarms as “unknown age” reduces the risk of relying on aged sensors.
I also recommend keeping a small maintenance log with model numbers and dates; it helps when you need to interpret chirps, verify compatibility for interconnection, or answer a landlord’s compliance request. My last review checklist used a simple spreadsheet template dated 2024-11, and it reduced the time spent guessing which units were replaced.
Key Takeaways
- Coverage follows code location requirements and the alarm’s listing limits for spacing and ceiling height.
- Sloped ceilings, beams, and airflow patterns can create coverage gaps even when square footage looks adequate.
- Replace batteries on the schedule for your alarm type, but replace the entire alarm at its end-of-life rating, often around 10 years.
- Use the test button monthly, clean after nuisance events per the manual, and avoid non-listed testing sprays.